Adding support in Cura slicer often feels like learning an important but delicate art in 3D printing. A small mistake can change the entire print outcome, causing sagging edges, rough undersides or complete failure. The way supports are added and positioned can decide whether a model looks professional or unfinished. Many beginners assume supports are just a button to toggle on and off, but anyone who has spent hours on a complicated print knows that support placement is a mindful task. You must understand how your printer behaves, how the plastic cools and how the geometry of the model responds to gravity.
This article is about how to add support in a confident and thoughtful manner. It explains why supports matter, how to place them correctly and how Cura allows you to choose between several support styles depending on your print.
How To Add Support In Cura Slicer?
Adding support in Cura slicer is more than just switching on an option. It is a process of understanding where the model needs help and how to offer that help without affecting the surface finish. Supports hold every part that would otherwise droop while printing, especially those overhangs that extend beyond what your printer can safely print in the air.
- Open Cura and load your model
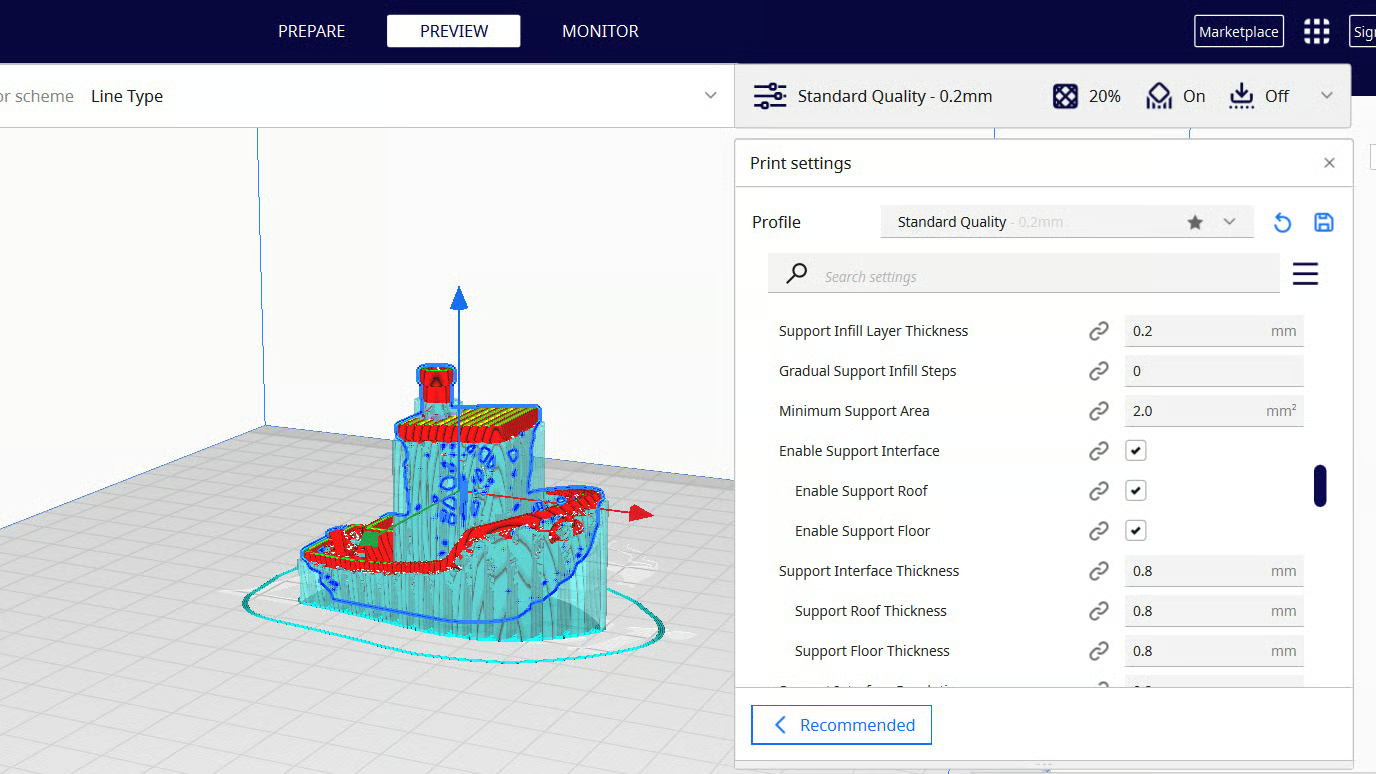
- Select the Print Setup panel on the right
- Choose Custom Mode for more detailed support settings
- Enable the Generate Support option
- Select Support Placement either Everywhere or Touching Build Plate
- Adjust the Support Overhang Angle based on the model geometry
- Set the Support Density to decide the strength and removal ease
- Preview the model layer by layer to verify the support layout
When you know how to control support placement, the entire print becomes stronger and much cleaner. This section gives a clear method to apply and support the right way with confidence.
Why Adding Support In Cura Slicer Is So Important?
Many new users underestimate how crucial supports are until they experience their first failed print. Without support, your printer tries to deposit hot material in mid air, causing it to sag, curl or completely detach. This happens because the filament needs something solid beneath it to cool and settle properly.
When this does not happen, the entire print can collapse from that point onward. Supports provide a temporary stage for every layer, giving the model the stability it needs until the print finishes. Another important advantage is the improvement in surface quality.
Instead of redesigning your model to avoid difficult angles, you can rely on Cura to generate structures that hold those angles firmly. With proper supports, printers can tackle complex shapes like bridges, arches and characters with outstretched arms. Supports empower your printer to do its job without fighting against gravity.
Tips To Add Supports In Cura Slicer Correctly:
Good support settings balance strength, ease of removal and print time. Many users learn this balance only after ruining prints or damaging the model during support removal. Thoughtful adjustments make the entire process smoother and safer.
- Start with a moderate support overhang angle to prevent unnecessary supports
- Use touching build plate when only lower areas need assistance
- Avoid very high density since it makes removal harder
- Add support blockers on areas that do not need support
- Use support enforcers where Cura misses difficult spots
- Always check preview mode before printing
- Test your settings on a small section of the model
Different Types Of Supports In Cura Slicer
Cura offers several support styles, each created with a different printing challenge in mind. Choosing the right type can save time and improve print finish. Below is a simple table to help you understand each support style.
| Support Type | Description |
| Normal Supports | Standard pillars used for most prints that need general support. |
| Tree Supports | Branch shaped supports ideal for figures and organic shapes. |
| Concentric Supports | Patterned supports that follow curves for smoother undersides. |
| Grid Supports | Strong lattice used when the model requires firm backing. |
| Zigzag Supports | Flexible and easy to remove compared to grid style. |
Which Is The Best Support In Cura Slicer?
The best support option in Cura slicer for most users is Tree Supports because they combine stability with gentle contact points, making them ideal for prints that include curves, small details and organic shapes.
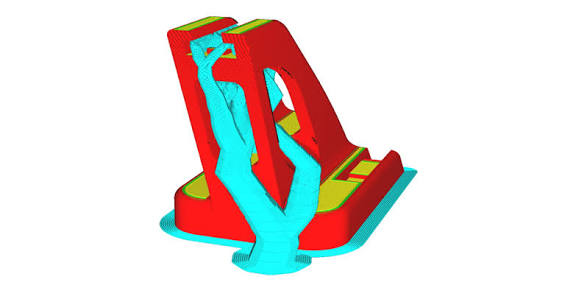
Tree supports grow upward in a branching style and avoid covering large areas of the model, which means they leave fewer marks and are easier to remove. Unlike grid or normal supports that cover wide sections, Tree Supports wrap around the model only where necessary, reducing both material usage and cleaning time.
They are also very efficient in handling complex overhangs without creating thick, rigid structures that risk damaging the print during removal. Although every print has unique needs, Tree Supports consistently offer the best balance between strength, quality and ease, making them the preferred choice for figurines, artistic work and most models with delicate features.
Support Placement Mistakes In Cura Slicer:
Support placement mistakes are extremely common among beginners and often lead to failed prints or rough surfaces even when the model is prepared well. Many people assume that adding more supports improves the print, but unnecessary supports can actually harm the model, increase filament consumption and extend printing time.
The real goal is to place just enough supports in the right areas so the print remains stable without creating additional problems.
- Adding excessive supports by setting a very low overhang angle
- Allowing supports to touch small details or sharp corners
- Using very high density that makes removal difficult and risky
- Ignoring the layer preview and printing without proper inspection
Understanding these mistakes makes the printing process smoother and helps the model maintain its shape and quality. Careful adjustment and previewing can prevent a large majority of issues before the print even begins.
Conclusion:
Adding supports in Cura slicer is not a simple mechanical action. It is a skill that grows as you understand your printer, your filament and the unique geometry of each model. Correct support placement turns difficult prints into successful results and allows you to attempt more complex designs confidently.
By blending thoughtful observation with the right Cura settings, you can print detailed models with clean surfaces and minimal post processing. With every print you complete, you become more aware of how supports work and how they guide the entire structure from start to finish. The more practice you gain, the more natural support selection and placement becomes.
FAQs:
Supports help the filament settle properly on overhangs and prevent sagging during printing.
No, too many supports waste time and material and may damage the model during removal.
Tree supports are great for organic shapes but normal supports suit engineering parts.
The support overhang angle decides where Cura begins generating supports.
Yes, if density is too high or supports touch delicate areas, removal can cause marks.